2x4' lm561c Strip Build w/ additional red

Strip light questions and discussions go here (Samsung, Bridgelux, Photo Boost, Growcraft, etc.)
Post Reply
User avatar
Ted
LED Maniac
LED Maniac
Reactions:
Posts: 312
Joined: Fri Jul 14, 2017 7:05 pm
Location: Los Angeles

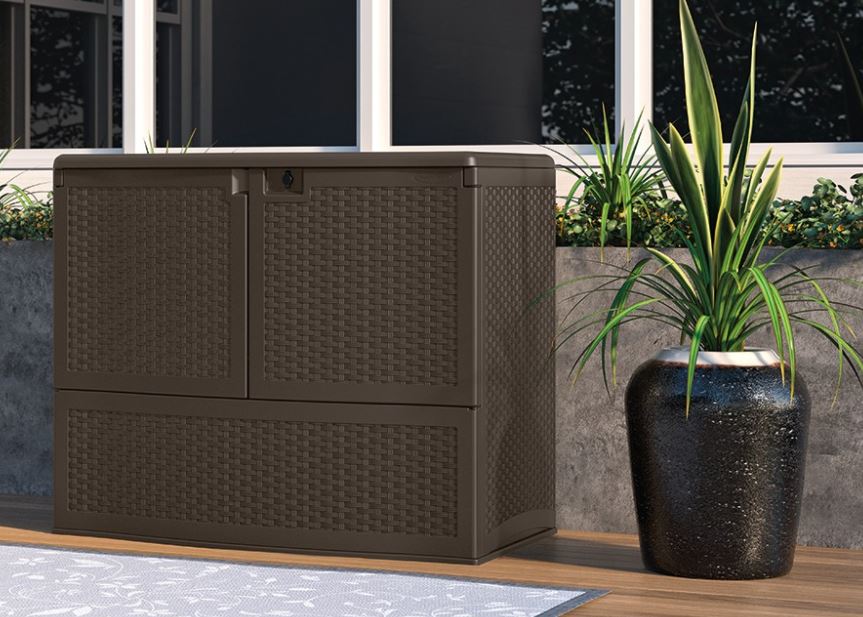
Hi all, I thought I would create a thread for my DIY quantum board build. I flower cannabis in a plastic patio box as seen below;
Capture1.JPG
Capture1.JPG (99.26 KiB) Viewed 3366 times
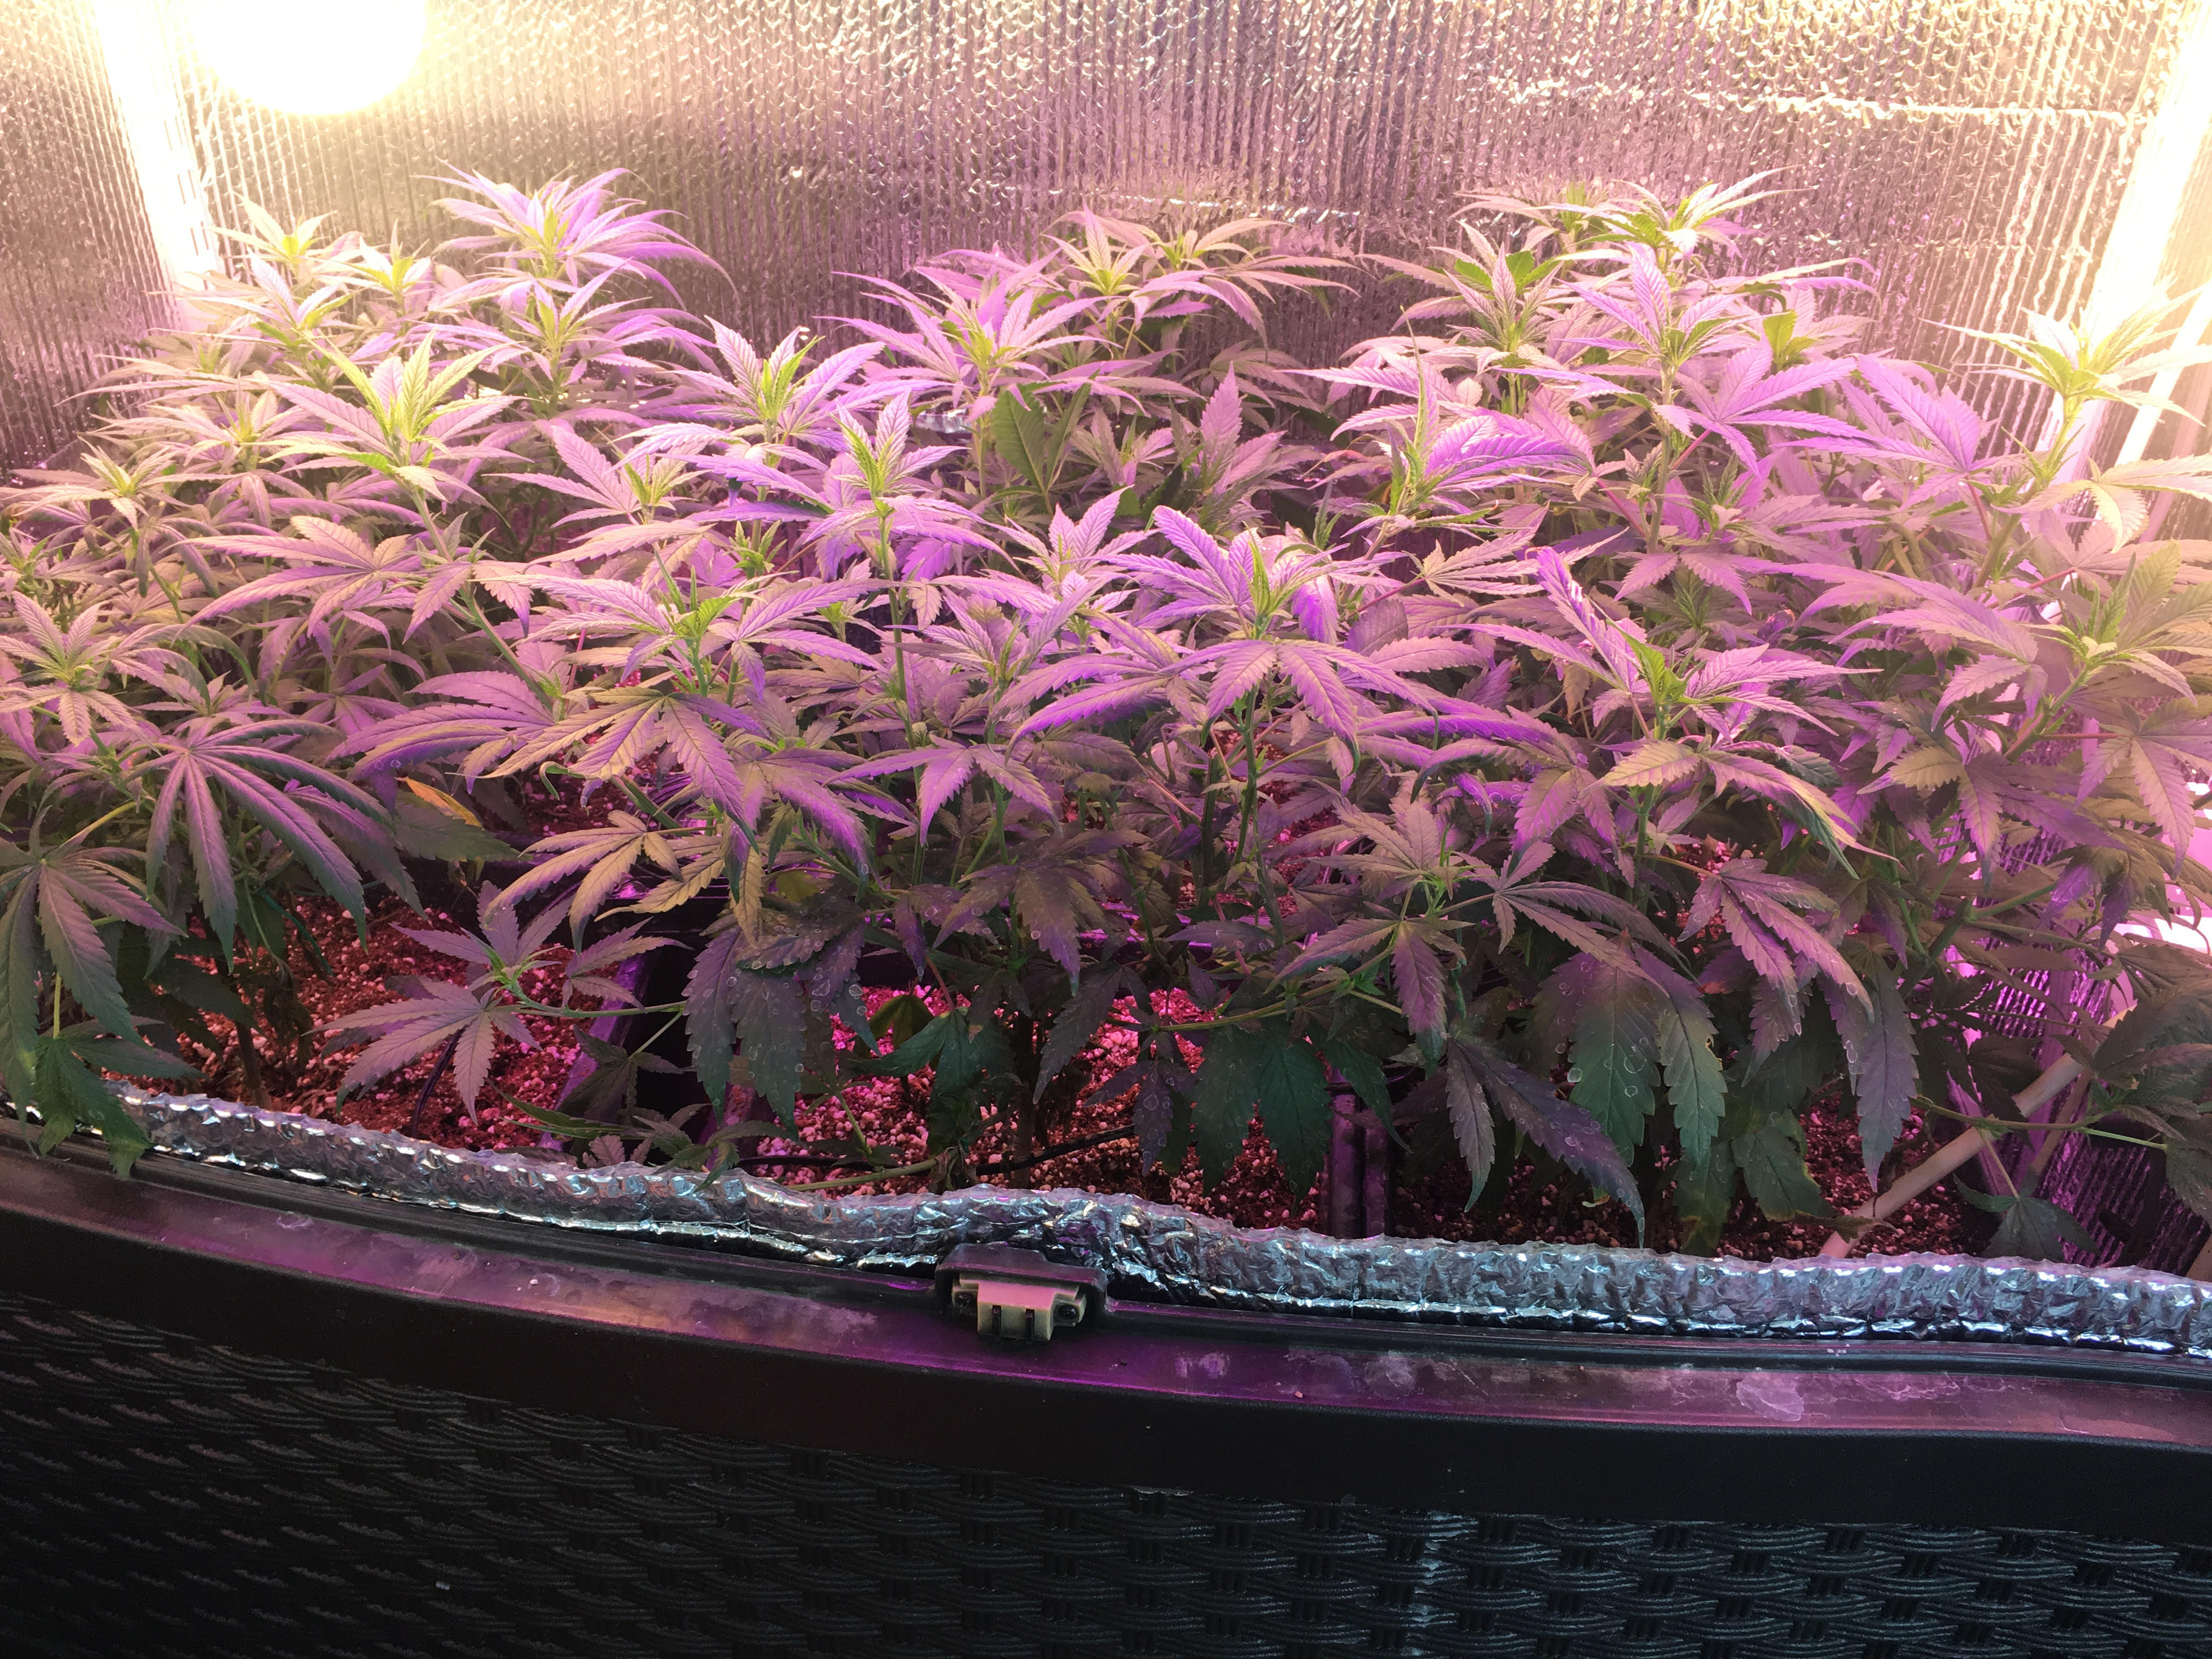
I have a smaller box of the same style for my vegetative plants, and I run 6 in each. When one is done, the veg plants move over to the bigger box, and clones take their place. The box lives on my balcony, and while it is exposed to the elements, I have another balcony above mine, so it doesnt get rained on and has limited exposure to direct sunlight (5pm to 7pm). The interior dimensions are 45" x 24", however, because the front bows outward to 26", there are 8.1 square feet inside, so it is essentially a 2'x4' setup. Its 38" tall on the inside, so vertical height is very limited. I cut holes in the floor and actually raise the box about a foot in the air, so the plant pots actually sit on the ground, but the level of the dirt is the same as the floor, as to give me more vertical space.
unnamed (2).jpg
unnamed (2).jpg (1.75 MiB) Viewed 3366 times
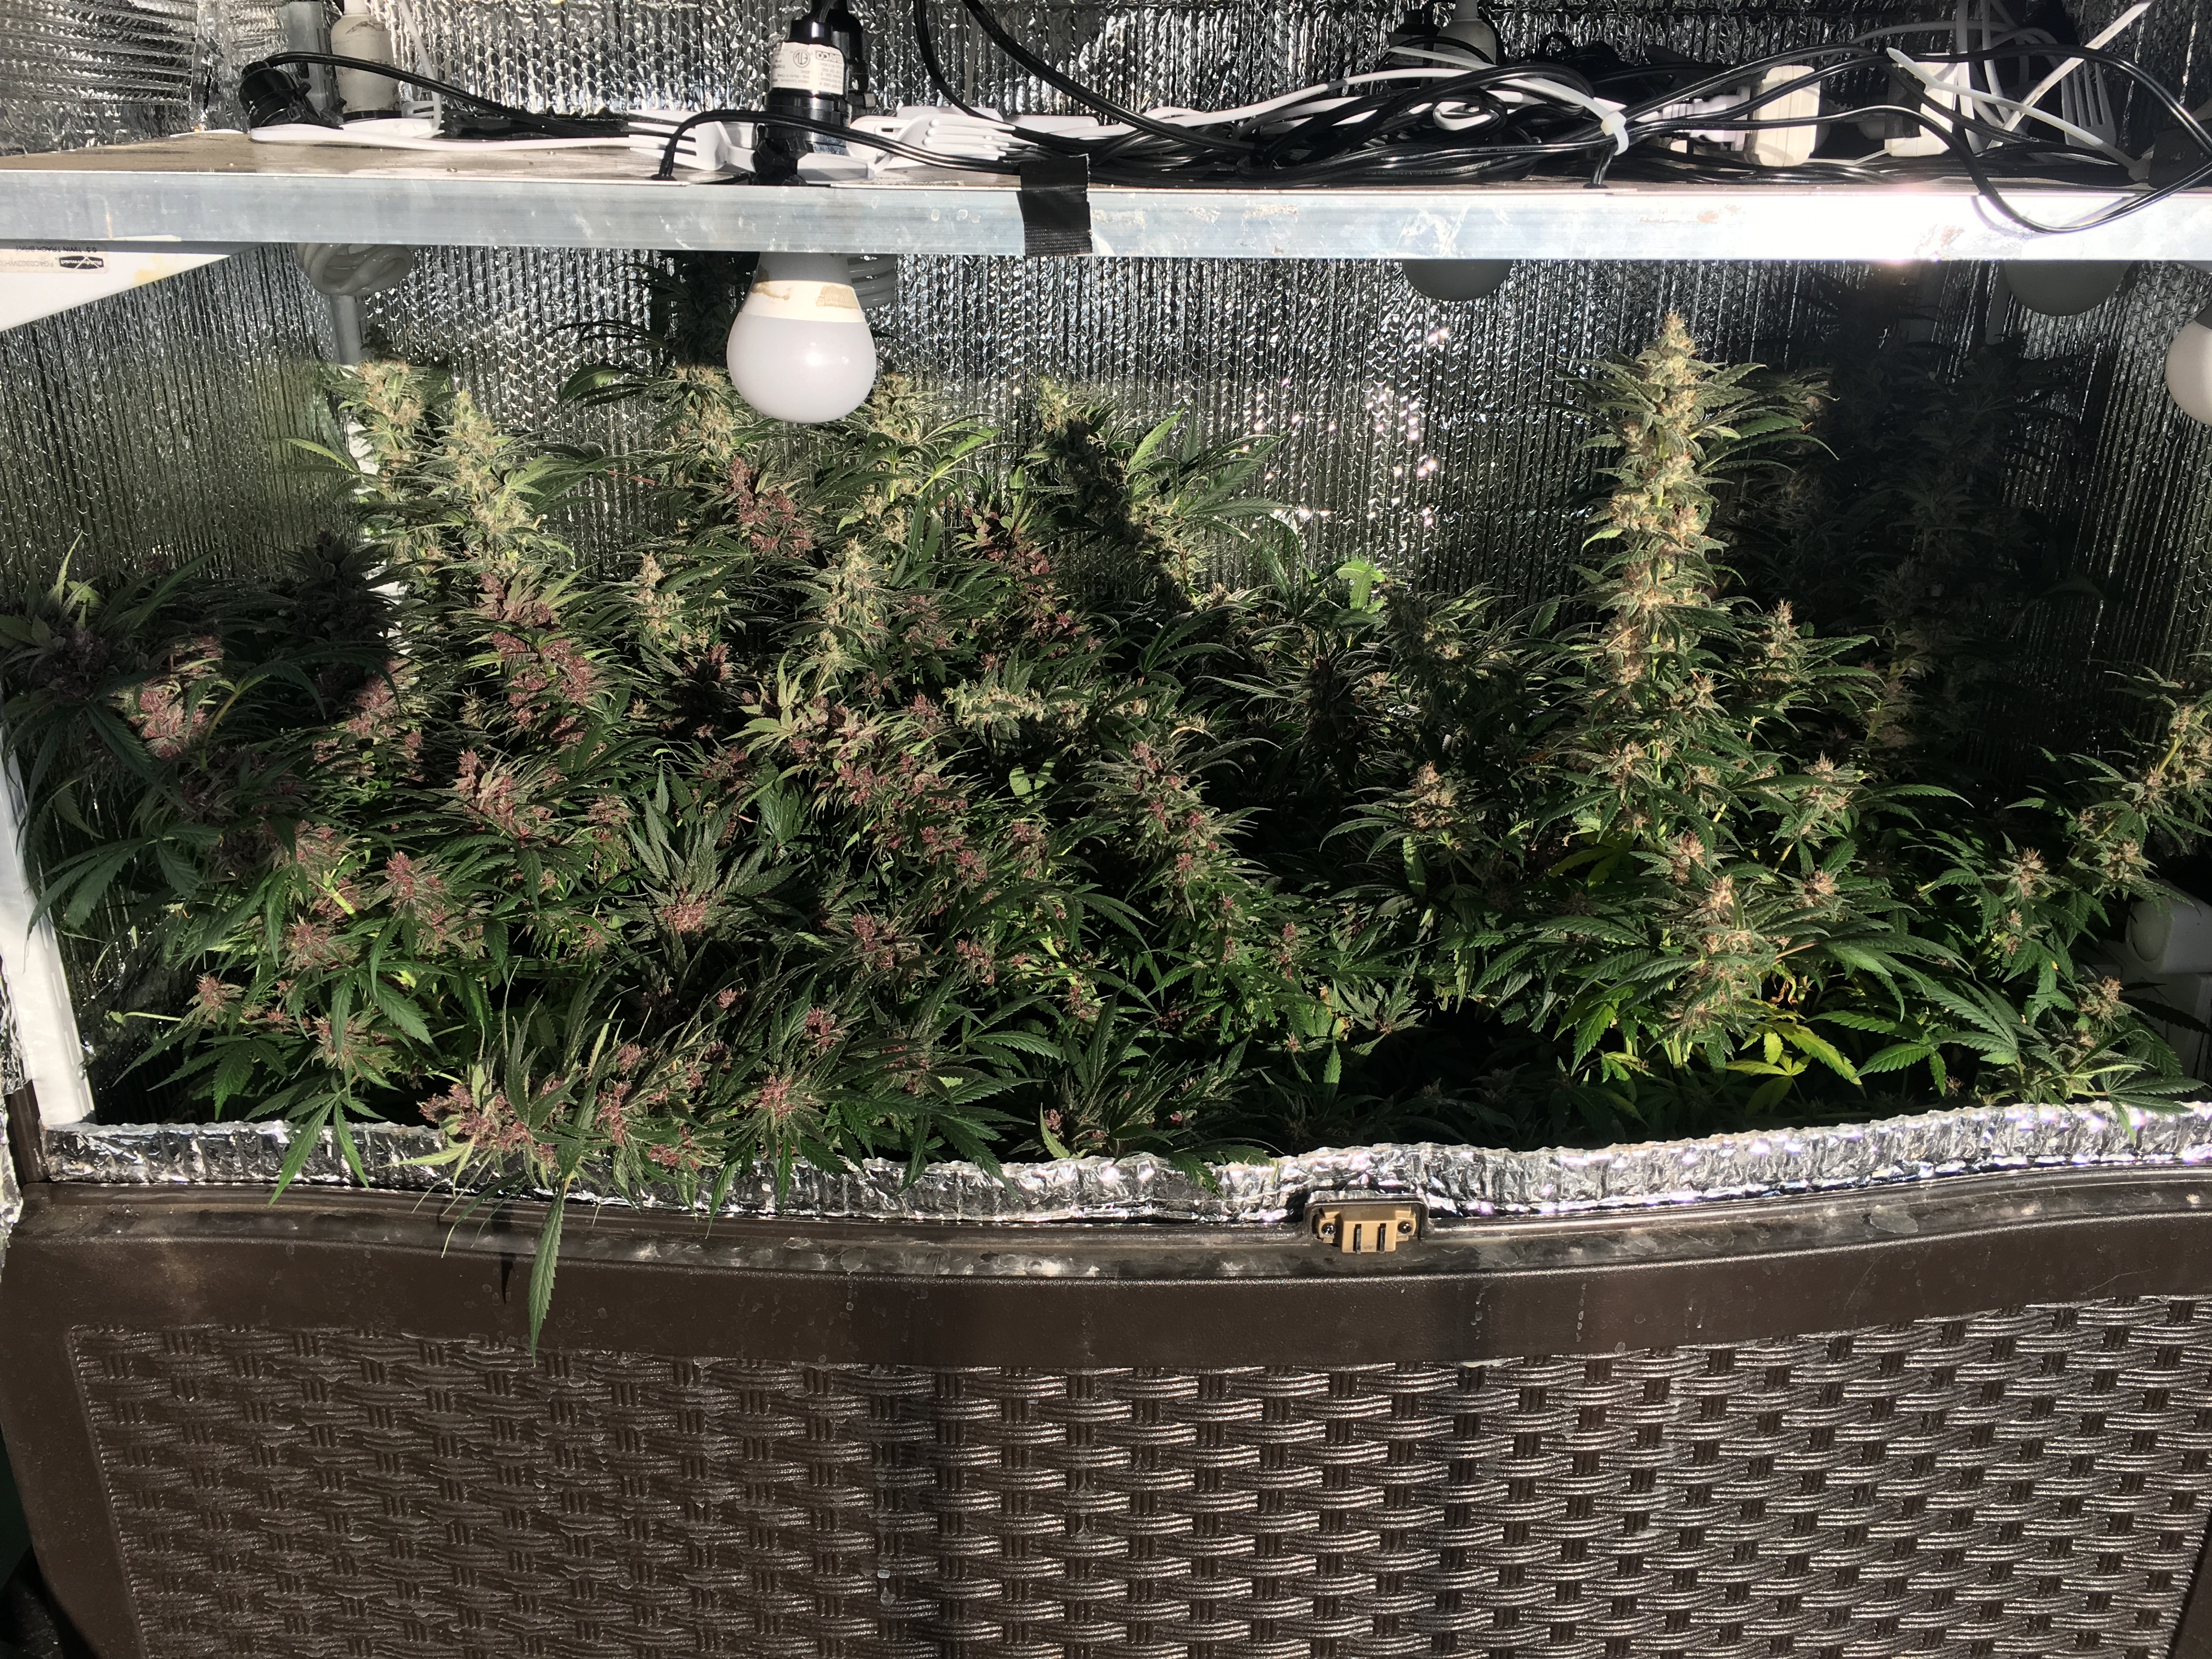
Currently, I have 6 Kingbo LED panels and 8 100w equivelent LED A19 bulbs that are mounted to an aluminum frame(or attached to plastic forks), which is held up by moveable shelving brackets as you can see here.
IMG_1056.JPG
IMG_1056.JPG (4.99 MiB) Viewed 3366 times
For my most recent harvest (I have only had 2 so far) I netted 7oz, or about 200 grams of trimmed and dried bud. If I add up all the stated watts for each component, I get to 320 watts, however my recently purchased Kill-a-watt device says the lights are actually pulling 360 watts from the wall, which would equate to .55 grams per watt, which isn't that great. Also, the buds aren't that dense, even the top most ones.

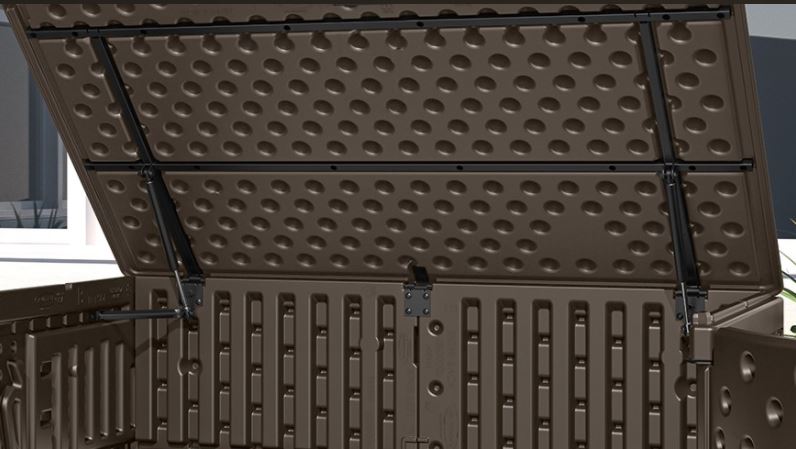
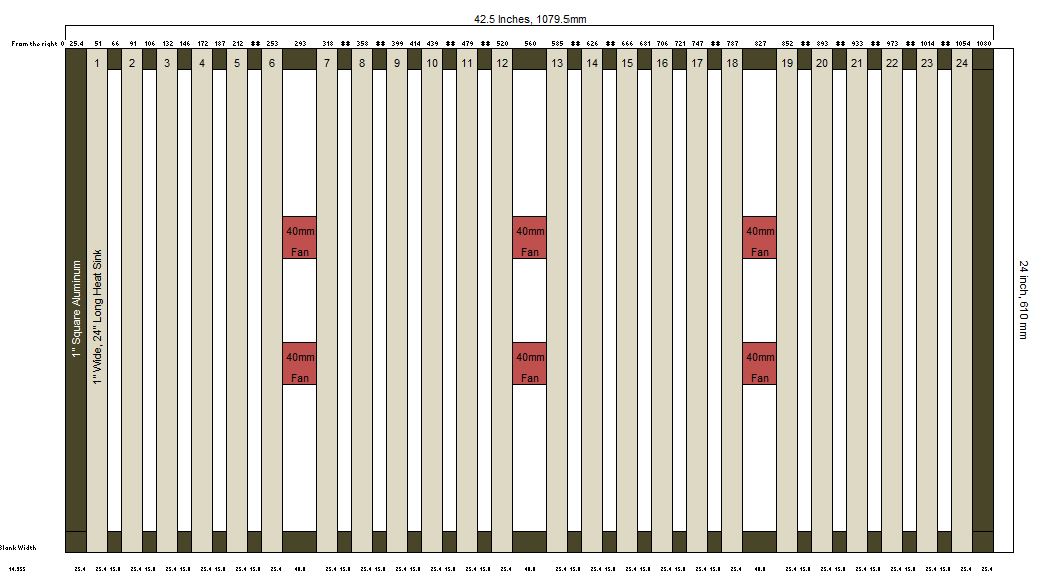
So here is the plan: I purchased 24 2ft LM561C strips, each containing 48 diodes, or 1152 diodes in total, along with a Mean Well HLG 480h-24a driver. I am going to glue each strip to 1" wide x 24" long heat sinks from heatsinkusa.com. The strips are actually 22" long so there is an extra inch of space on each side to mount to a 1" square aluminum tube. The whole thing is going to be mounted to the lid of the box:
Capture2.JPG
Capture2.JPG (60.02 KiB) Viewed 3366 times
Because it will be right up against the lid, I plan on installing some fans into the array to dissipate the heat. I do have a 4" ventilation fan in the top right corner of the box, but I dont think it will provide adequate airflow.

So it should look like this if you were looking from the top down.
Capture 3.JPG
Capture 3.JPG (99.55 KiB) Viewed 3366 times
The shorter side will be 2" above the long side, as to give the heat sinks some space from the roof. I'll be putting this together this weekend, let me know your thoughts and suggestions. I'll post some updates.
Last edited by Ted on Wed Sep 06, 2017 7:43 pm, edited 2 times in total.
User avatar
LEDG
Site Admin
Reactions:
Posts: 1599
Joined: Sun Jun 04, 2017 8:15 pm

Nice! That box is deceptively large.

It's good that you're thinking about thermal management in an enclosure like this. Is the one hole you mentioned the only way air can enter/escape this thing? Those fans you've added will definitely help to move air around but you'll have to make sure you can exhaust the hot air that's blowing around. Ideally, there would be intake holes on the bottom to bring in cool air too, but I can see how you'd not want to destroy that nice looking box.

I like your drawing - the strip layout looks great. Looking forward to more pics :idea:
Want to Support the Site?

Use this Amazon referral link and any purchase you make within 24 hrs will earn LEDgardener a commission at no cost to you!
User avatar
Ted
LED Maniac
LED Maniac
Reactions:
Posts: 312
Joined: Fri Jul 14, 2017 7:05 pm
Location: Los Angeles

I have a 120cfm fan that is pulling air out. The whole thing is 36 cubic feet, so it can empty all the air in the box in less than 20 seconds.
IMG_1128.JPG
IMG_1128.JPG (2.74 MiB) Viewed 3349 times
I mentioned in another thread I use smartthings home automation system, and the exhaust fan is activated based on a sensor inside the box.
IMG_1130.PNG
IMG_1130.PNG (126.34 KiB) Viewed 3349 times
The system is also configured to turn off the lights if the temp gets above 90 degrees and send me a text message at the same time.

I mounted the driver to the outside of the box, on the side closest to my house. That way I can keep the driver heat outside the box.

There is a balcony above me so the box doesnt get rained on. The driver is rated for outdoor use as well.
Attachments
IMG_1129.JPG
IMG_1129.JPG (2.13 MiB) Viewed 3349 times
User avatar
LEDG
Site Admin
Reactions:
Posts: 1599
Joined: Sun Jun 04, 2017 8:15 pm

Shit, you're laughing then. I'm going to read up on that automation.
Want to Support the Site?

Use this Amazon referral link and any purchase you make within 24 hrs will earn LEDgardener a commission at no cost to you!
User avatar
Jolly Green Giant
LED Wizard
LED Wizard
Reactions:
Posts: 835
Joined: Thu Jun 15, 2017 1:35 am
Location: somewhere in NY

that is a awesome outdoor controlled micro grow!!!!!!!! more people need to build these with limited spaces!!!!! Your light idea sounds perfect... and LED covered the exhaust... What I'm curious about is have you moved it indoors over winter with a tray to collect the excess water???? I'm assuming you let it run off the balcony when its outside.. I could see moving it into a closet with a tray and keep it going year round! Or a basement near a drain that would work also.

again that's a really nice set up!
User avatar
Ted
LED Maniac
LED Maniac
Reactions:
Posts: 312
Joined: Fri Jul 14, 2017 7:05 pm
Location: Los Angeles

Thanks for the kind words Jolly Green Giant,

I guess one of the perks of living in Los Angeles is that I dont have to deal with temperature extremes too often. I originally built this box last November, (just after California legalized recreational cannabis), so it has made it through one winter. Because I only flower with this box, I run the lights from 8pm to 8am. The heat of the lights is enough to keep the box warm at night, even during the winter. The ventilation fan will only run if it reaches a certain temperate, so when it's off and the lights are on, the temps will climb, even on the coldest of nights (which is about 38 degrees F or 4 degrees C). I did have a tiny space heater in there for a couple of months to keep the box warm after the lights went off. Also, the box itself is double walled, so it can keep the temperature pretty stable.

You are right, I just let the water run off the balcony. If you live somewhere where it snows, you would have to bring it inside. The floor of the box can hold a little bit of water, not more than several cups. You could devise some sort of tray inside to catch or direct water though.

The thing I like about the box is that it is pretty inconspicuous, I have a plant that blocks the exhaust fan, and most people don't notice it when they come over.
User avatar
bvolt
Forum's First Member!
Reactions:
Posts: 378
Joined: Wed Jun 07, 2017 6:05 am
Location: Boston
Contact:

Wow... Really great build!

That's further evidence that anyone can find a space to grow something.

BTW - with those A19 bulbs, if you want more intensity:
Led Bulb_COBs.png
Led Bulb_COBs.png (149.62 KiB) Viewed 3323 times
  • You can cut the bulbous part of the bulb right off (a dremel and cutting wheel, or even drill a hole and then use snips).
Yes, you'll need to be more careful... but the same holds for any exposed LED.

Hope to see additional pics as you make your mods.

Take care.
You might wanna double-check anything you've read here...
User avatar
Ted
LED Maniac
LED Maniac
Reactions:
Posts: 312
Joined: Fri Jul 14, 2017 7:05 pm
Location: Los Angeles

I always thought I was losing some light due to the diffuser that covers the LED bulb. That is a really good tip.

I just got the heatsinks in from heatsinkusa.com today, 1" wide by 24" long, precut.
IMG_1135.JPG
IMG_1135.JPG (2.15 MiB) Viewed 3322 times
Its probably overkill to mount all these strips to their own individual heatsink. But when compared to the cost of 48' of U channel aluminum at home depot, it was about a $60 difference in total cost between the two, not to mention I can save some time cutting as well. This is putting my total project costs near $700.

Direct Costs:
Driver + 24 Strips: $440
75g Thermal Glue x 4: $60 (might not use it all, but just in case)
Heat Sinks: $125
1" Aluminum Square for frame: $32
Total Direct: $657

I did purchase a multimeter, soldering iron, and wire, but those costs will be allocated over their useful lives, or in the case of the wire, how much actually goes into the project. In any case, I think $700 is a good estimate of the total cost (not including labor... :cry:). In comparison, I was looking at getting a 6 Cree CXB3590, 300 watt kit from timber grow lights, which would have cost me $629 + tax. Alternatively, this setup is comparable to the HLG 550 (four 288 quantum boards stuck together) ($1,049), in that mine setup and the HLG 550 both have 1152 diodes and run off a 480 watt driver.

I dont think I'm saving any money by doing this myself, but my grow environment is unique, and the solution I've devised should work better than a pre packaged kit. I also kinda enjoy it as well.
Last edited by Ted on Fri Jul 21, 2017 8:18 pm, edited 3 times in total.
User avatar
LEDG
Site Admin
Reactions:
Posts: 1599
Joined: Sun Jun 04, 2017 8:15 pm

I'm so jealous of the heat sinks you guys can get down there. Great choice. This is shaping up nicely!
Want to Support the Site?

Use this Amazon referral link and any purchase you make within 24 hrs will earn LEDgardener a commission at no cost to you!
User avatar
Jolly Green Giant
LED Wizard
LED Wizard
Reactions:
Posts: 835
Joined: Thu Jun 15, 2017 1:35 am
Location: somewhere in NY

yea that is a nice perk. I live south of Buffalo NY in the snow belt :) we can hit -10 without a wind chill during February. with 3 feet of snow over a weekend lol

I would probably figure out a way to block them off the bottom and hook up a hose to run to a drain... flushing always the fun part with water removal.

again it's a awesome micro grow :)
Post Reply