Low profile slim BXEB build finally finished

Strip light questions and discussions go here (Samsung, Bridgelux, Photo Boost, Growcraft, etc.)
Post Reply
User avatar
RadRiverOtter
LED Enthusiast
LED Enthusiast
Reactions:
Posts: 48
Joined: Sun Jan 26, 2020 10:13 pm

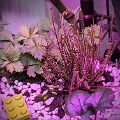
Finally got around to posting this. Really happy with how this turned out. Ended up spending a little more then was necessary for aesthetic purposes, but I think its still ¼ what I would have paid for a prebuilt setup. Probably wouldn't have been so darn pretty either. I don't have a par meter, but my cheapo lux meter is reading a nice 16k spread at 2 feet. I plan to add 2 more rails with uv/660/fr diodes. Still in the process of building those. Hiding the wires for all of those tiny starboards is a massive pita.
IMG_02042020_223213_(810_x_1080_pixel).jpg
The rails are just clamped in place by a strip of flatbar so it is expandable. I did end up drilling through the two outermost sinks, just to give it a cleaner look, but it's not necessary.
IMG_02042020_224903_(1080_x_810_pixel).jpg
IMG_02042020_224932_(1080_x_810_pixel).jpg
IMG_02042020_224957_(1080_x_810_pixel).jpg
IMG_02042020_225008_(1080_x_810_pixel).jpg
IMG_02042020_225025_(1080_x_810_pixel).jpg
IMG_02042020_225039_(1080_x_810_pixel).jpg
IMG_02042020_225051_(1080_x_810_pixel).jpg
IMG_02042020_225110_(1080_x_810_pixel).jpg

Funfact: Some Ammeters require a shunt resistor. The manufacturer often only says this on their own website not the reseller page. Definitely roasted my first one.
IMG_02042020_225125_(810_x_1080_pixel).jpg
If anyone is interested in doing a similar build here's the recipe.
Total parts:
(2) 2' aluminum angles
(3) 2' aluminum flatbar
(8) carriage bolts + acorn nuts
(4) boat loops
50' of aircraft cable
A flagpole cleat
(5) 4' x .6" heatsinks from heatsinkusa
(Definitely could get away with .5" c-channels to save $)
(2)BXEB-L0590U-27E1500-C-C3
(4)BXEB-L0590U-40E1500-C-C3
(4)BXEB-L0590U-50E1500-C-C3
(No real reason for using all of these different kelvins. It just felt right?)
(1)HLG-240H-24B
(1)100k ohn potentiometer with guitar knobs
(1) analog ammeter
(1)Aluminum project box from Amazon
(1) 50' extension cord from dollar store
(4) 5port wagos
(1)15' roll of solid core wire
(1)25' roll of Thermal tape
Swamp botanist by day... Bedroom botanist by night.
User avatar
RadRiverOtter
LED Enthusiast
LED Enthusiast
Reactions:
Posts: 48
Joined: Sun Jan 26, 2020 10:13 pm

IMG_03042020_000859_(1080_x_810_pixel).jpg
IMG_03042020_000938_(1080_x_810_pixel).jpg
Swamp botanist by day... Bedroom botanist by night.
Capt. Saicin
LED Enthusiast
LED Enthusiast
Reactions:
Posts: 83
Joined: Mon Jul 30, 2018 7:20 pm

I would recommend to use some acrylic covers in case you dont use sunglasses. Your eyes will thank you in the long run :D
Big sheet of acrylic isnt that expensive. I'm using 3mm opal/translucent on all my lights with great success since they are hanging openly in rooms and i dont want to walk around with sunglasses all the time.
User avatar
RadRiverOtter
LED Enthusiast
LED Enthusiast
Reactions:
Posts: 48
Joined: Sun Jan 26, 2020 10:13 pm

Capt. Saicin wrote:
Fri Apr 03, 2020 1:37 pm
I would recommend to use some acrylic covers in case you dont use sunglasses. Your eyes will thank you in the long run :D
Big sheet of acrylic isnt that expensive. I'm using 3mm opal/translucent on all my lights with great success since they are hanging openly in rooms and i dont want to walk around with sunglasses all the time.
Hmmm... You make a good point. Does the acrylic actually help your eyes without blocking the intensity? I thought acrylic covers were just for diffusion.

Where are you sourcing your sheets of acrylic from?
Swamp botanist by day... Bedroom botanist by night.
Capt. Saicin
LED Enthusiast
LED Enthusiast
Reactions:
Posts: 83
Joined: Mon Jul 30, 2018 7:20 pm

I buy them (Plexiglas 0D010 DF in 3mm to be precise) locally in a craft/architecture supply shop. Yes, they are mainly (especially the opal ones) for diffusion but it is much more pleasant to look at instead of the individual diodes. Still too bright to look at directly for longer periods but no more burned in strip in the vision after taking a quick look. For longer plantwork, ie daily pollination of the chilis with a swab, i still use sunglasses.
User avatar
HomerPepsi
LED Enthusiast
LED Enthusiast
Reactions:
Posts: 81
Joined: Mon Nov 26, 2018 9:39 am

Hi,

Was the 2 inch flat bar underneath each side just for extra heatsinking and support?

Very nice and clean build. Those slims are looking slick.

Cheers,
User avatar
RadRiverOtter
LED Enthusiast
LED Enthusiast
Reactions:
Posts: 48
Joined: Sun Jan 26, 2020 10:13 pm

HomerPepsi wrote:
Sun Apr 05, 2020 2:20 am
Hi,

Was the 2 inch flat bar underneath each side just for extra heatsinking and support?

Very nice and clean build. Those slims are looking slick.

Cheers,
Thanks! Are you referring to the flatbar mounted underneath the angle? It actually doesn't really serve a purpose, other than hiding the wagos when viewing from below. I wanted a bit of extra space to tuck the wires into while leaving them exposed enough to easily get access for additional strips.
Swamp botanist by day... Bedroom botanist by night.
Li_Mu_Bai
LED Enthusiast
LED Enthusiast
Reactions:
Posts: 25
Joined: Tue Apr 21, 2020 6:31 am

Nice build. Planning on doing something similar with the same LEDs.

How to you affix the LED strips to the heatsink, do you use some kind of thermal glue?

And you mentioned you could have used .5" C-channels instead of the .6" heatsinks. Do you know where to buy the .5" C-channels?

Thanks.
Post Reply